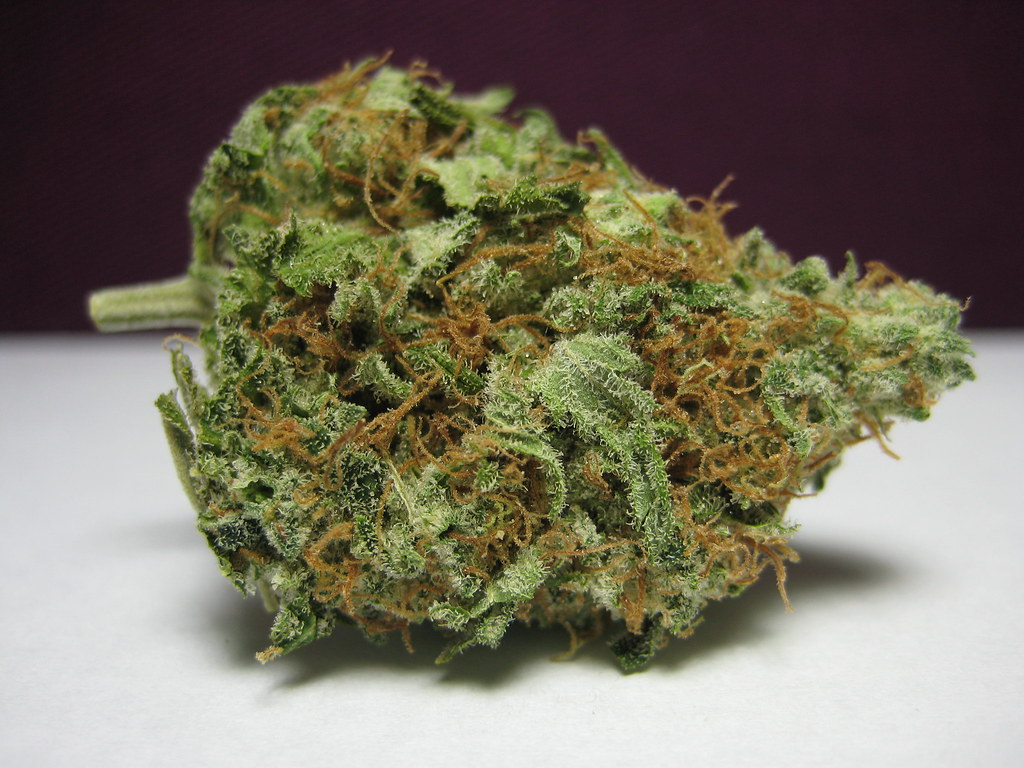
After taking care of your crop for months, spending a few extra weeks curing the crop is nothing. With this process, the rough, moist buds will turn into blossoms of smooth, flavorful smoke.
Harvest time may seem like the last stage of the growing process, but this is far from the truth. After harvesting the fruits of your work, it is time to carry out the two most decisive steps: drying and curing.
Drying is just as it sounds. It is the process of removing most of the water contained in the buds. Drying will make the buds more resistant to mold, more easily manageable and much more pleasant to smoke. Some growers are already happy with smoking dried buds, but if you want to take the potency and flavor of your crop to the next level, you will have to cure the buds with quality cannabis bags, pouches or jars.
WHY SHOULD YOU CURE YOUR CANNABIS BUDS?
Curing marijuana is an involved process, which can take weeks. Although it may initially seem like a hassle to cure your weed, you will find that the wait makes for a smoother and more flavorful smoke in return! The curing process involves drying out buds over time by reducing humidity levels until they are dry enough to start disintegrating into sugar molecules: this leaves behind unpleasant flavors as well as harsh effects on smokers’ mouths. However, when appropriately cured, these dried sugars break down further through oxidation into flavorless carbon dioxide without any of those pesky side effects from before–you’ll be left with rich terpenes (flavorful oils) instead!
By curing the buds, their desired flavors are also preserved. The molecules that bring unique and intense flavors to cannabis are known as terpenes. But these are volatile compounds that easily degrade under high temperatures. Therefore, to obtain tasty buds, it is advisable to gently dry, followed by a long curing process.
The flavor is not the only advantage of curing. This process can also improve your high. The THC, the psychotropic component of cannabis, degrades over time, becoming a cannabinoid called CBN. CBN is considered to be slightly psychoactive but is associated with different effects than THC.
Curing your crop will also lengthen its shelf life and further reduce mold cases. If properly cured and stored, your buds can last up to a year or more without losing their potency or flavor.
FACTORS AFFECTING THE CURING PROCESS
Before explaining how to cure marijuana buds, let’s look at some factors that influence the process. This will help you understand what to look for and what to avoid.
AVOID EXPOSURE TO LIGHT
During the curing process, you should store your stash in a dark place. Light is one of the factors that can cause the degradation of valuable molecules, such as THC and terpenes. To prevent light from spoiling the flavor and potency of your flowers, store the jars of buds in a dark closet or dark box. Another option is to store the buds in glass jars, a type of glass that filters out all visible light except violet, offering additional protection.
PROTECT YOUR STAY FROM HEAT
Heat will only be a significant problem if you live in a region where temperatures are exceptionally high. Heat is another factor responsible for the degradation of cannabinoids, which can reduce the potency of your buds. Store your jars in a cool place to minimize damage and mold growth. The ideal ambient temperature for the curing process is around 21 ° C.
FIND THE OPTIMAL POINT OF HUMIDITY
Curing is a straightforward process, as long as the buds have been properly dried. If they are too wet before curing, the buds will clump together, and mold is likely to form. Excessive humidity will also encourage anaerobic bacteria to start breaking down your buds. A tell-tale sign that this is happening in the ammonia smell comes out of the jars every time you open them.
On the other hand, if the buds are too dry, curing will result in a stash of crumbly blooms, producing a harsh and unpleasant smoke. Ideally, marijuana flowers should be dried in a room with a humidity level between 45-55%. In this way, the outside of the bud will be drier and slightly crumbly, and the inside will be more humid. When it is time to cure, the humidity will increase slightly, reaching an optimum level close to 62%.
The best Way of Curing Cannabis buds
Now that you know these fundamental factors keep them in mind when curating your stash. Curing is a matter of opening and closing the jars at the right time. By placing your dried cannabis flowers in airtight glass jars, you will create an optimally controlled environment. These closed containers allow the moisture inside the flowers to rehydrate the outside without leaving the buds too moist. The ultimate goal is to get a stash of smooth smoke and exceptional flavors.
STEP 1: MANICURE YOUR BUDS
To start, you have to prepare your flowers properly. If you have dried your buds individually, you can start curing them. But, if you have decided to dry them on the branch, you will have to cut them. Separate each bud and remove the sugar leaves.
STEP 2: STORE YOUR BUDS
Next, put your buds in airtight containers. Sealable glass jars are a sturdy option, allowing you to control your buds throughout the entire process easier.
Place the flowers inside the container without squeezing too much, filling it up to 75% of its capacity. It is important to leave room for air. Now is a good time to check that your stash is dry enough for curing. Gently shake the jars. If the buds are hitting the glass freely, proceed to the next steps. But if they start to clump together, this indicates that the outside is still too wet, so the buds will need to be further dried.
STEP 3: CURE THE MARIJUANA WITH THE IDEAL MOISTURE
For a more enjoyable and creative way to store your canned goods, you could use jars that have been creatively decorated. You can paint the lids with an attractive color like blue or red; maybe write on them in chalk for children’s artwork; decorate it with scrapbooking supplies such as stickers, washi tape, ribbon etc.; put their name or something funny inside of it. These are really good ideas if you’re planning so when they open these gifts years later – they will be able to remember what kind of jar is theirs!
STEP 4: REGULATE THE HUMIDITY LEVEL
During the first few days, you should take a look at the buds twice a day. Inspect them through the glass and watch out for mold. Each time you look at them, you should open the lids for a couple of minutes to allow fresh air to exchange. Keep an eye on the hygrometers. If the reading shows 60-65% humidity, usually proceed. But if the humidity is too high, remove the lids from the jars for about 3 hours to let the excess moisture escape. Instead, if the humidity is too low, leave the lids on for longer periods, without air exchange sessions. If you still do not detect an increase in humidity, put a small pack of humidity in the affected jars.
STEP 5: YOU’RE ALMOST DONE
To cure your buds, keep opening the jars once a day for two weeks. To maintain an optimal humidity level in between openings, make sure you have plenty of water available and that it is clean. After three weeks, your flowers will be well cured to smoke, but if you are the most patient smoker, the reward will not end there! Your plants continue to improve with curing time up until six months, when their peak quality falls off.
Ieva Kubiliute is a psychologist and a sex and relationships advisor and a freelance writer. She’s also a consultant to several health and wellness brands. While Ieva specialises in covering wellness topics ranging from fitness and nutrition, to mental wellbeing, sex and relationships and health conditions, she has written across a diverse range of lifestyle topics, including beauty and travel. Career highlights so far include: luxury spa-hopping in Spain and joining an £18k-a-year London gym. Someone’s got to do it!
[email protected]
- CBD Vape Oil By JustCBD UK-Cloud Nine Chronicles: A Journey with JustCBD UK’s CBD Vape Oil - October 13, 2023
- How to cure your marijuana buds - January 28, 2023
- CBD OIL FOR PAIN RELIEF - January 27, 2023




![Expedition - Trail Edition [Black]](https://atomicvaporstore.com/wp-content/uploads/2023/10/Expedition-Trail-Edition-Black-300x300.webp)

